Safety & securityTalk On Tech SolutionsStructured Cabling Guide: Make CAT6A, Install 2 Cabinets + Trunk, Patch Panel, TP-Link Switch & AP
Structured Cabling Guide: Make CAT6A, Install 2 Cabinets + Trunk, Patch Panel, TP-Link Switch & AP
Long-form16:12
Published Jun 4, 2026, 7:16 PM · 4mo ago

Talk On Tech Solutions
53.4K subscribers · median 5.3K views
Hands only · confirmed$Likely
Views
7,438
+3 views/hour
Likes
119
1.6% of views
Comments
12
0.16% of views
Checked every 24 h while the video is this age · last check 5h ago · next in 1088 min. YouTube itself updates public counts with a short delay.
Views / hour now
3
measured 5h ago
Peak views / hour
3
5h ago
Avg views / day
56
since upload
First 24 hours
—
not tracked from upload
vs channel median
1.4×
Rank in channel
#8
of 21 tracked
Engagement
1.8%
likes + comments / views
Est. ad revenue
$45–$97
lifetime, $6–13 RPM
Views over time
0 readings · line: total views · bars: views gained per hour
Live tracking started
The chart fills in as FameX records new readings.
Description
Join this channel to get access to perks:
https://www.youtube.com/channel/UCupw078JKouoF-6ZjEsR5Bw/join
📌 In this video, I show you how to build a professional small network rack from scratch – including making CAT6A cables, installing two 6U cabinets, trunk cabling, and setting up TP-Link Omada gear.
Whether you're a network tech or a serious DIY pro, this step-by-step guide covers everything from crimping RJ45 connectors to managing cables in a trunk.
🔧 What You’ll See:
✅ Making CAT6A cables – stripping, straightening, pairing, and crimping RJ45 connectors correctly (including pass-through vs. standard).
✅ Mounting 2x 6U cabinets – positioning, leveling, and securing.
✅ Trunk cabling – running main bundles between cabinets / zones.
✅ Installing patch panels & cable manager – keeping everything clean.
✅ TP-Link Omada 24-Port PoE Managed Switch – placement & power.
✅ TP-Link EAP653 Access Point – mounting & connecting.
✅ CAT6A faceplates + RJ45 jacks – keystone termination.
✅ Patch cords (50cm & 20cm) – proper length for patch panel → switch.
🛠️ Gear Used:
2x 6U wall-mount / floor cabinets
CAT6A solid copper cable
CAT6A RJ45 connectors & keystone jacks
Patch panel (24-port)
Cable manager (horizontal)
TP-Link Omada 24-port PoE switch (managed)
TP-Link EAP653 access point
Patch cords: 50cm & 20cm
CAT6A faceplates
Cable trunking / finger duct
⏱️ Timestamps:
0:00 – Overview of the build
0:45 – Making CAT6A cables (crimping & testing)
2:56 – Terminating faceplates (RJ45 jacks)
4:54 – Mounting the 2 cabinets
6:30 – Installing patch panel & cable manager
8:05 – Rack & stack: TP-Link switch + accessories
8:26 – Patching with 50cm & 20cm cords
4:33 – Connecting EAP653 access point
12:50 – Cable management & trunk finishing
13:40 – Final test & performance tips
💡 Pro Tips:
Use strain relief boots for CAT6A field plugs.
Leave service loops in the trunk for future moves.
Color-code patch cords: e.g., blue for data, yellow for PoE devices.
For Omada, adopt the
Tags
tp-linkomadaappinstallationcablemanagedcat6apatchpanelswitch
Details
- Published
- Jun 4, 2026, 7:16 PM
- Length
- 16:12 (972 s)
- Format
- Long-form
- Category
- —
- Audio language
- —
- Quality
- —
- Captions
- —
- Made for kids
- —
- Licensed content
- —
- Video ID
- BY_8Y_WA01g
More from Talk On Tech Solutions
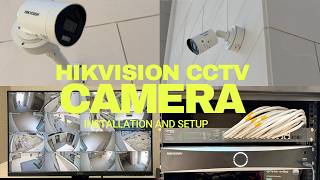 Hikvision IP Camera Installation FULL SETUP CAT6A | 8MP ColorVu Pro + 6MP Dome + 32CH NVR #hikvision1.9K views · 7h ago · +432/h
 How to Install Hikvision IP Camera System Complete CCTV Setup Network Cable Cat6 Tutorial #hikvision203K views · 2w ago · +202/h
 Properly Cover & Protect Cat6 Electrical Wires 🔧⚡ #electrical #tech #networking #cable5K views · 3w ago
 How to Install & Configure 330 CCTV Cameras Dahua & Hikvision School Project 6× 64CH NVR Full Setup284K views · 3w ago · +163/h
 How to Configure ZKTeco Time Attendance Machines | BioTime 9.5 Setup, Employees, Schedules & Reports1.2K views · 8w ago
 How to Install Analog Intercom Door Lock Connection Wiring for All Brands Hikvision, Dahua, Commax,3.1K views · 2mo ago · +2/h
 How to Install & Configure IMOU Cruiser Triple-Lens 3+3+5MP Outdoor Smart Security Camera Setup67.4K views · 2mo ago · +19/h
 How to Install TP-Link EAP615 Access Point | Complete Configuration Guide for All TP-Link EAP Models2.2K views · 2mo ago · +1/h
Statistics from the YouTube Data API, tracked by FameX. Views per hour, revenue and comparisons are FameX estimates.